Canon 650/651 & 670/671 genuine ink tanks - How to refill
Genuine Canon PGI-650, PGI-670 and CLI-651, CLI-671 cartridges/ink tanks are easy and economical to refill - if you know how and have the right inks and refill gear.
Note: This refill method can be used with all genuine 650/651 and 670/671 tanks including standard, setup and XL version. Don't use it with 680/681 standard ink tanks!
Canon CLI-651 (yellow) refilling...
1) Remove empty ink tank from printer and seal the ink outlet. If you've kept the original Canon outlet clips (good thinking) - click one back on.
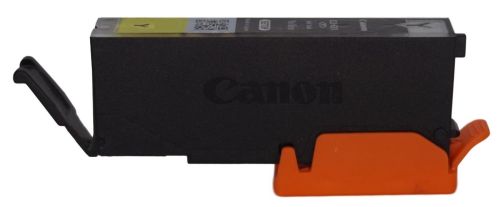
If you haven't saved the genuine clips, get some generic ones. You get a set (2), if you buy a refill kit here, or you can order the clips separately.

It is important to seal the outlet - to prevent the ink leaking out while you're putting it in. Don't try refilling - without sealing the ink outlet first!
2) Find the QR code on the top label then use something sharp (eg Stanley knife) to scrape that part of the label off and expose the original fill plug (small plastic ball) under it.
3) Remove the ball plug - using a screw tool like this. It works like a cork screw. Screw the tip into centre of the plug until it feels tight. Take care to not damage the hole! If it does get damaged, the new plug may not seal and the tank is likely to leak.
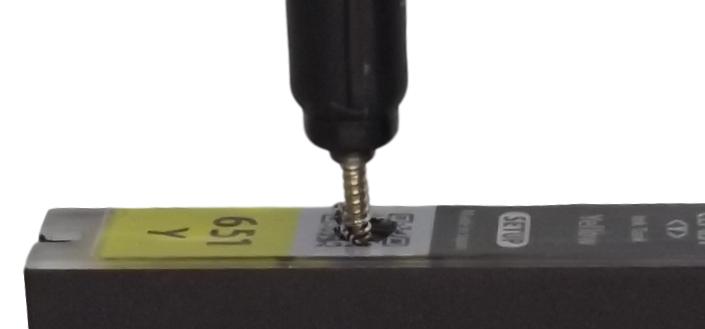
When tight, pull on the tool and the plug should come out with it.
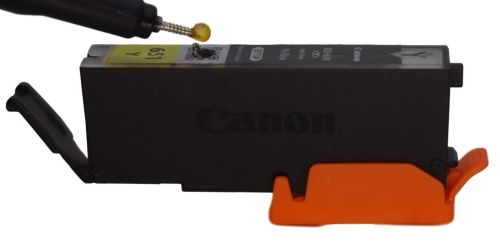
IMPORTANT: Don't get creative making/ drilling holes anywhere else - unless refilling XL ink tanks.
The end 20mm of standard tanks (see below) is not connected to the ink outlet, so it's pointless filling through there.
And if refilling 670/671 setup or standard tanks ...any ink injected in the indicated section will leak out as quickly as you put it in. This will not only make a mess, but could flood the chip at the same time. So...be careful where you drill - if you must drill. Or better still - don't drill!
.jpeg)
4) Slowly fill the ink reservoir through the hole - using a syringe/needle combo. Don't rush this step or you'll make a mess. Unless refilling XL type ink tank, the compartment you're injecting into only holds about 2ml of ink and will fill up pretty quick.
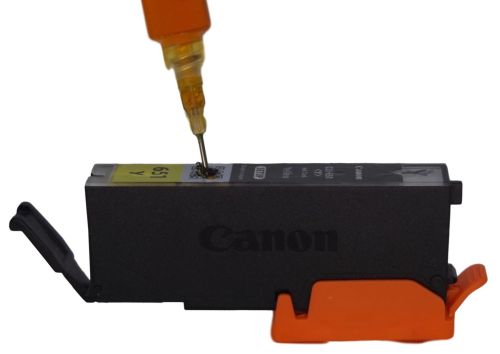
Tip: A corner of folded up tissue paper or paper towel held against the needle entry point is a good way to catch any escaping ink - before it overflows and makes a mess.
5) Wait about 30 seconds for the ink level to drop as it transfers across into the 'sponge' side of the tank - then top it up. Don't wait any longer or attempt to inject even more ink as this can cause overfilling.
6) Plug the ink hole and clean around the plug using a tissue (if inky).
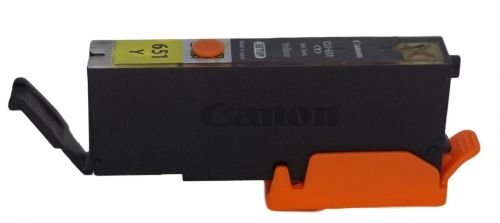
Apply strip of tape over the plug and part way down both sides of the tank to prevent the plug getting knocked out in the printer. Make sure the ink tank is clean and dry before attaching the tape and use a high grade masking (or similar) tape.
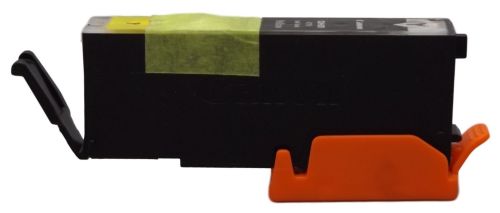
Note: Sticky or masking tape does not make a reliable seal on it's own. Most tape glues will dissolve in contact with ink and the tape will come off before too long. Really not worth trying!
7) Check the ink tank for leaks. Remove the outlet clip and place ink tank in upright position over something it can drip into. Few drops is fine, but if ink continues dripping after 10 seconds - there is something wrong. Don't install a leaking tank!
Ink tank leaking? If you followed the instructions and are confident the fill hole is not damaged, the most likely cause of a leak is an overfilled sponge.
The easiest way to remove excess ink from the sponge is to turn the tank upside down and use a corner of a folded paper towel or tissue paper to 'wick' up a ml or so through the ink outlet. Then turn the tank upright to test before continuing to next step.
8) Reset the chip (if you use a chip resetter), install tank back in printer and test print.
9) Rinse syringe, outlet clip etc in clean tap water.
That's it...
Tip: If after reading this page you don't feel confident enough to refill genuine Canon 650, 651, 670 or 671 cartridges (fair enough)...there is an even easier way. Find it here.
Need more info? Contact us.


